This section walks you through the steps you need to take to configure your OneWelcome RITM instance.
We start the process under the assumption that the instance was already installed and integrated with the OneWelcome Identity and Access Management Platform. We suggest you follow the steps outlined below in the order they are presented. Of course, you may have to review them as you discover options and features that are made available throughout the platform.
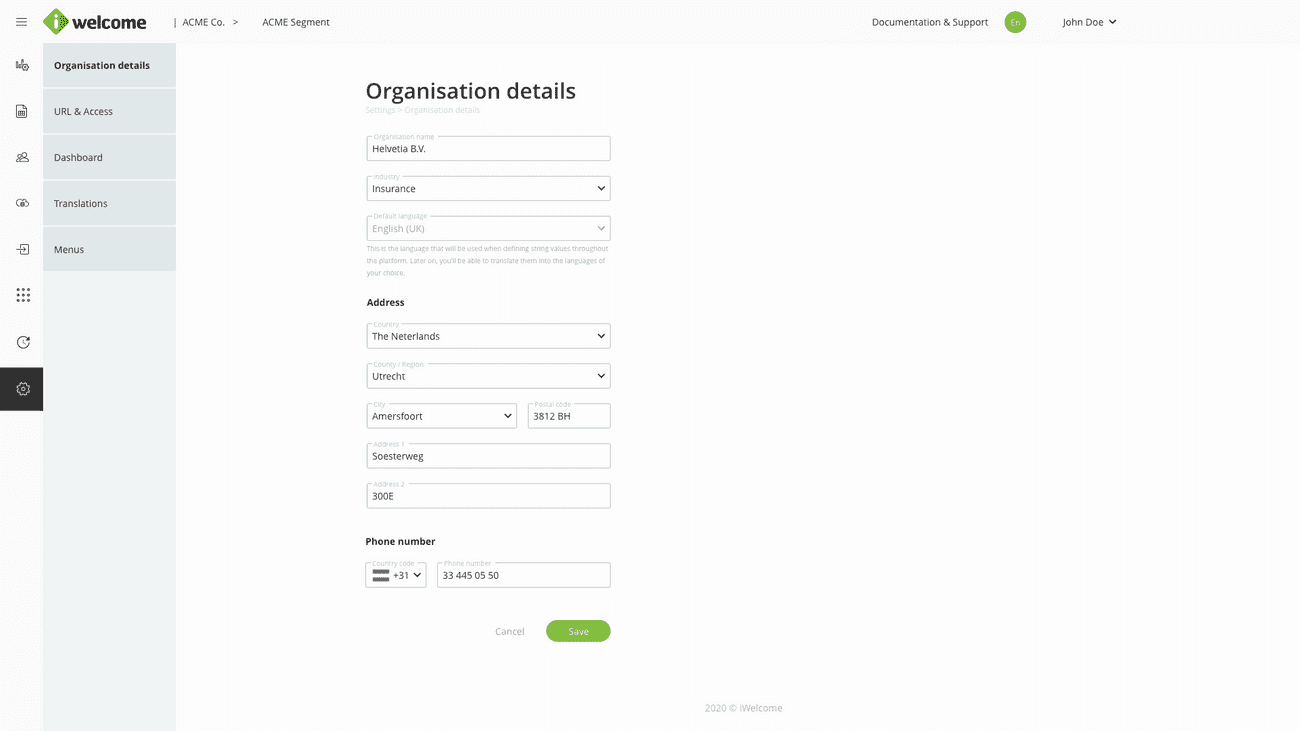
Review & update your organisation data
Please define your organisation data. Pay special attention to the default language setting under the General tab as any content you will define going forward will be associated to this language. Later on, you'll be able to add different other languages and translate or adjust the tone to fit your organisational culture.
To find out more about how to configure your organisation's data, please visit Settings.
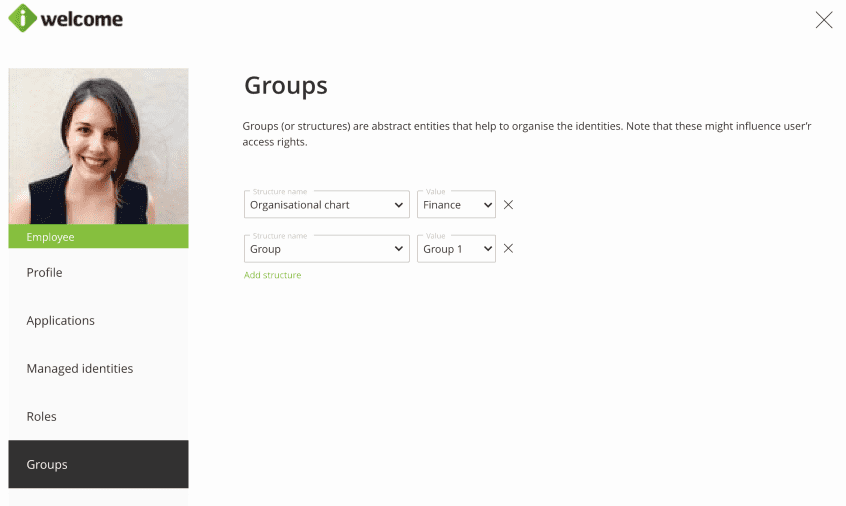
Organise managed identities
As defined under Terminology, a structure represents a logical means of organising identities. There are two main types of structures:
- Static structures. These are groups that the organisation defined manually. Additionally, identities will have to be associated to the groups defined under these types of structures by an organisation user (employee, partner, etc.) with the proper access rights. The system provides ways to automate this step through different sets of rules and mass updates.
- Dynamic structures. These are groups that are inferred from the attributes that are already associated to an identity. An example would be grouping identities by country and city that can be done by defining a Dynamic structure (as long as the identity has these attributes associated).
Regardless of the structure type, it can be defined on a single level (flat structures) or can be nested on several levels (nested structures). Note that any identity can be part of one or more structures at any given point.
Having structures defined is an important milestone as these are the main instruments that will allow granular control over what identities and associated data a specific role can control.
To find out more about the different types of structures and how to set them up, please visit Structures.

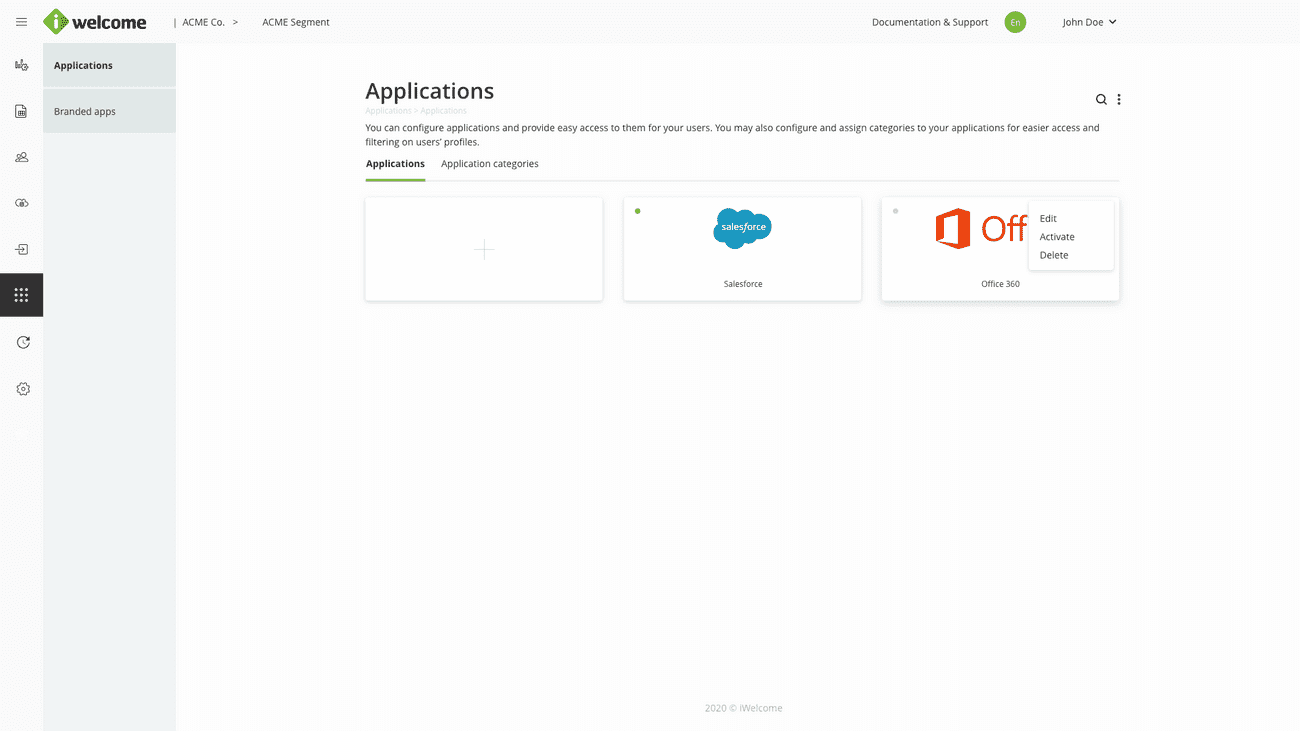
Configure applications
Within the platform, these are applications that have already been integrated with OneWelcome Identity and Access Management and for which the organisation would like to provide single sign-on capabilities to its users in a controlled way.
RITM allows setup for pre-integrated applications. The available options include:
- Defining application roles. These are the roles that are passed to the third application when the user logs in (through single sign-on);
- Organising applications into categories (defined under application categories).
To find out more about different types of applications, please visit applications.
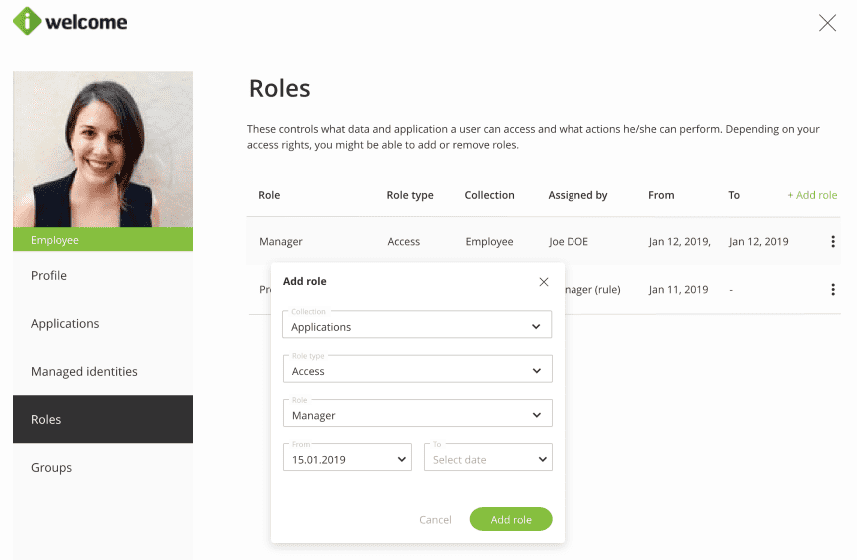
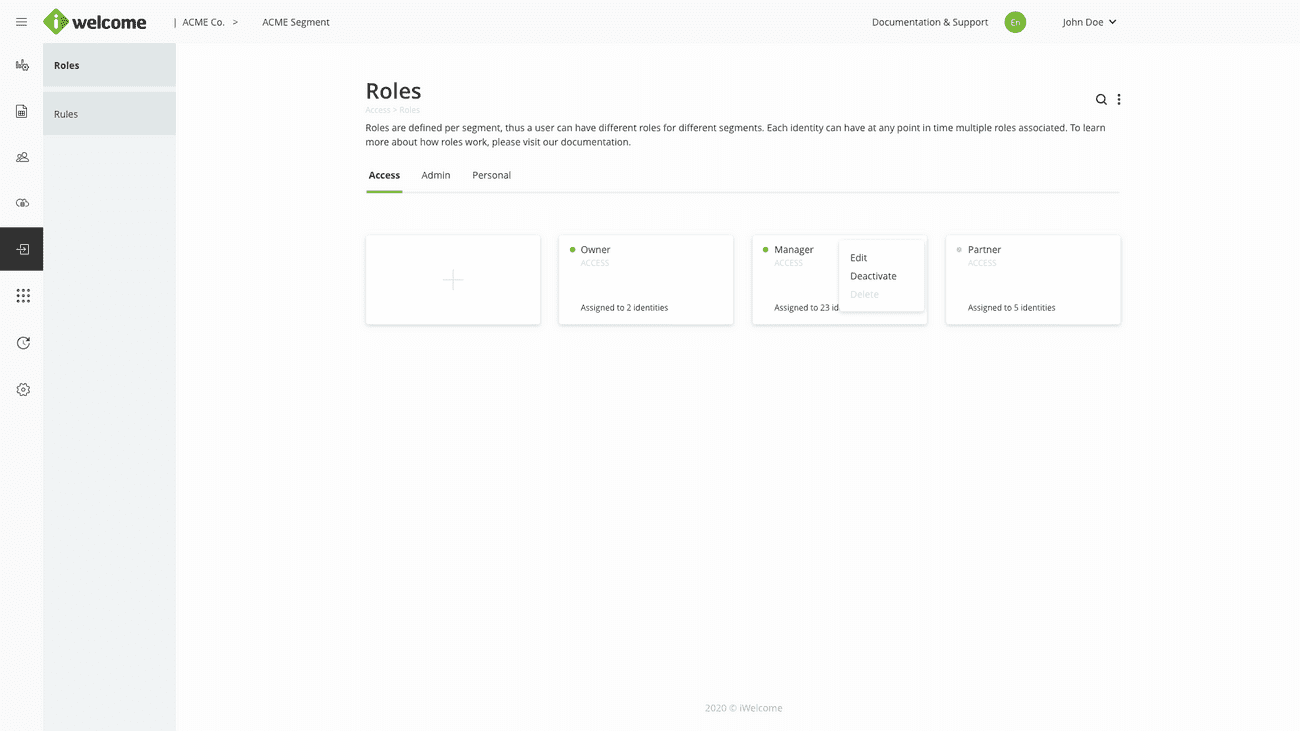
Define roles
Roles and their associated entitlements are at the core of the OneWelcome RITM platform. The platform provides three types of roles:
- Access roles provide access to applications for the users that have them associated. The same role might provide access to one or more applications. Furthermore, during the single sign-on process, the platform passes to the application the application roles that were defined for it and that were selected while defining the role.
- Admin roles provide access to the platform for users that have them associated, and through it, to the other identities that are managed inside it. Access to other identities is controlled through entitlements that define the scopes (list of identities that a user with a specific role might affect) and actions that can be performed, including the option to delegate certain access rights to the identities in the scope.
- Personal roles control what personal data a user may access on his own profile and what actions he/she can perform on it.
While defining the roles, keep in mind that any identity may have multiple roles associated to it at any given point in time. This approach, combined with a rigorous role design process shall help alleviate the burden of managing a large number of roles.
To learn more about the different types of roles and how they can be used to manage access, please visit Roles.
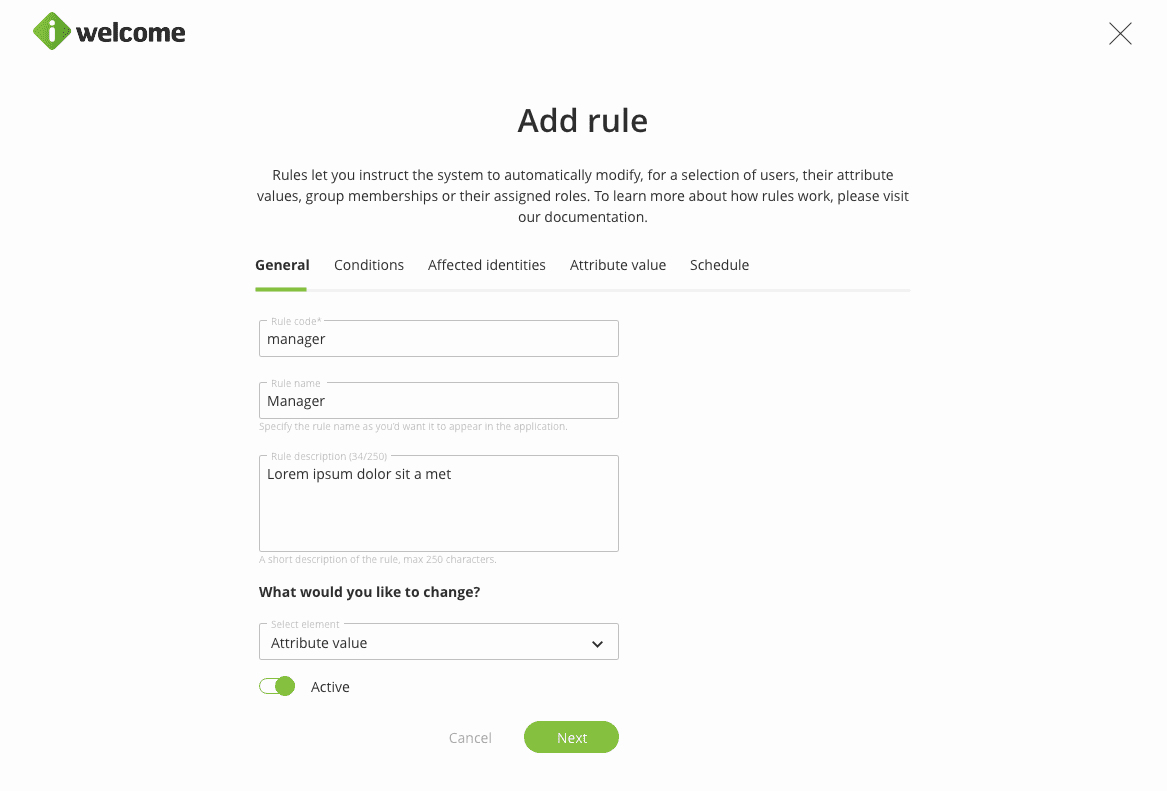
Setup attribute & structure-related rules
Rules represent the main mechanism that can be used to automate the role assignment, group membership or attribute value change process to identities. Through them, one can set specific conditions related to the identity belonging to specific group(s) or to one or more attribute values. In case the conditions are met, the determined roles, groups or attributes are assigned to the identity.
The rules engine works like a background system job that is triggered periodically. As a consequence, the changes in users' roles may not be visible instantly.
In case there's a need to assign, as a one-time action, specific roles to a large number of identities based on their affiliation to a specific group or having a specific set of attributes, please refer to the Mass updates action under Users.
To read more on how rules work, please visit Rules.
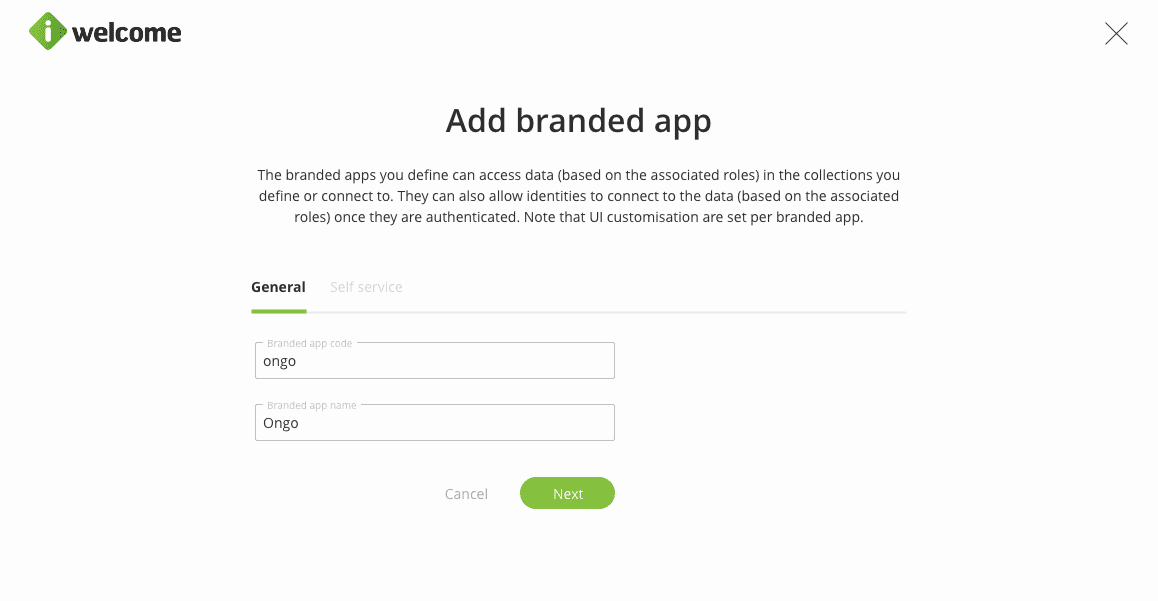
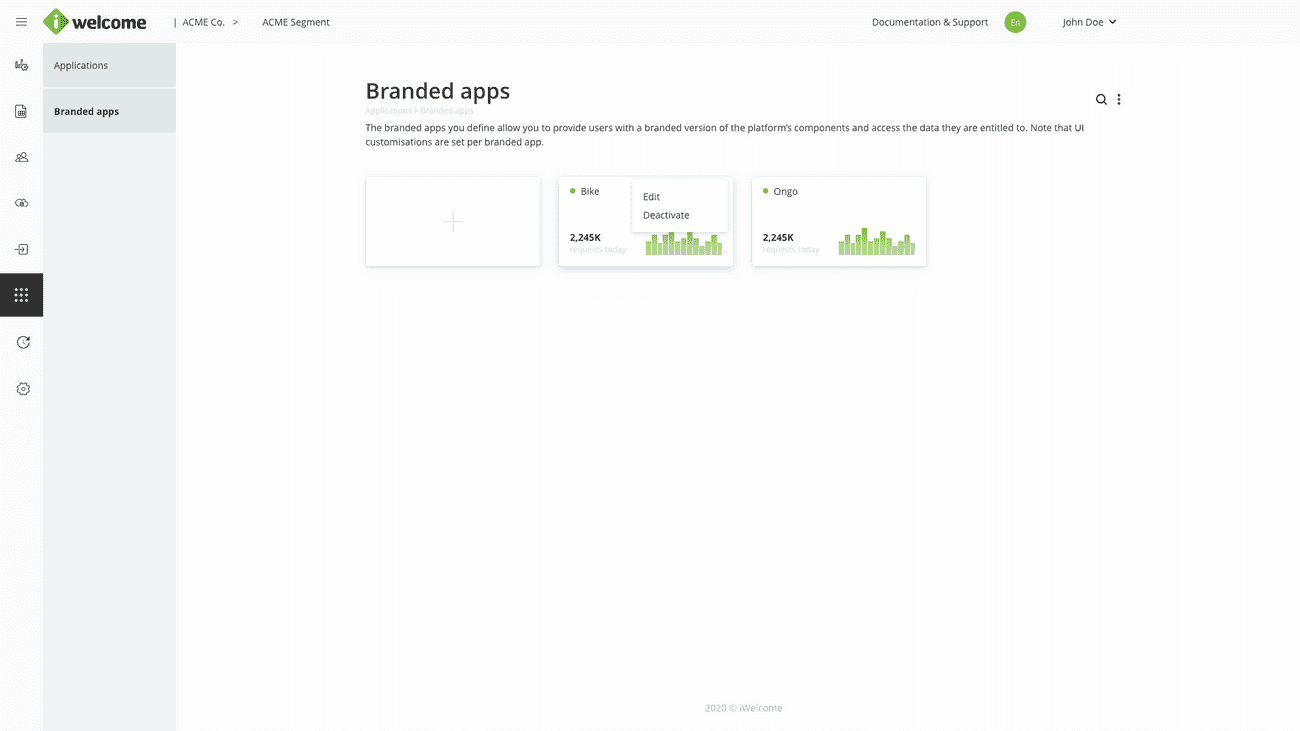
Define branded apps
Branded apps represent the applications that the organisation owns and controls and whose identities are managed through OneWelcome IAM. For each such application the system generates a unique application URL (with several sub-domains to cater for different services and ways to access, such as self service, portal and API).
To learn about how to setup branded apps, please visit Branded apps.
Customise the user management portal
There are two major groups of settings that can be performed to facilitate user management:
- Renaming, grouping and sorting the identities' attributes in the default language within Data -> Attributes;
- Setting up data-value-conditioned rules rules based on group membership or attribute value conditions Access -> Rules -> Data value conditioned.
Customise the platform look and feel
Under this menu item, there are options to configure (for each individual branded app) the look and feel of the platform (colours, logos).
To learn more about the ways you can customise the platform, please visit Applications -> Branded apps.
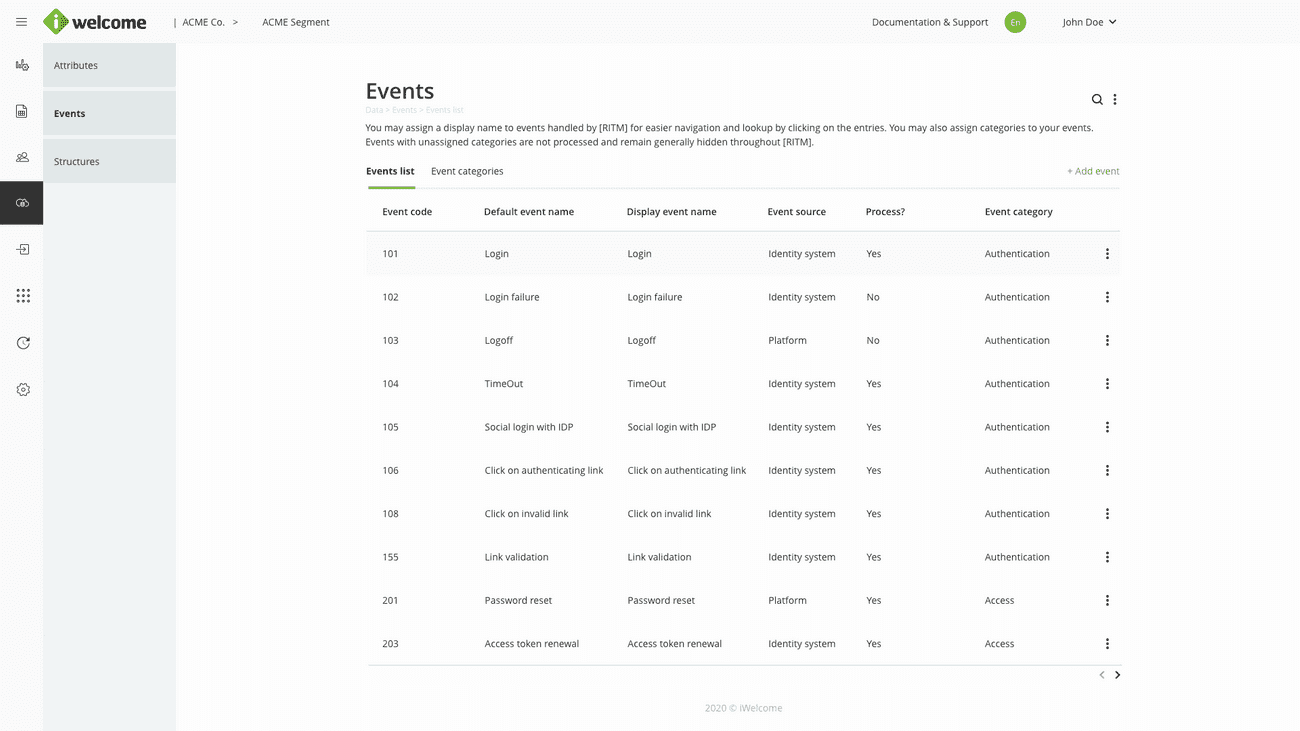
Customise the data visualisation settings
This area controls what data the organisation's employees & partners will see in the Dashboard & Reports sections of the portal. Options include events' processing & naming, events' grouping and display options for the entry, dashboard page. Keep in mind that deactivating an event from being processed affects the entire platform (the respective event will not be processed at all).
To find out more about how to customise data visualisation, please visit Data -> Events.
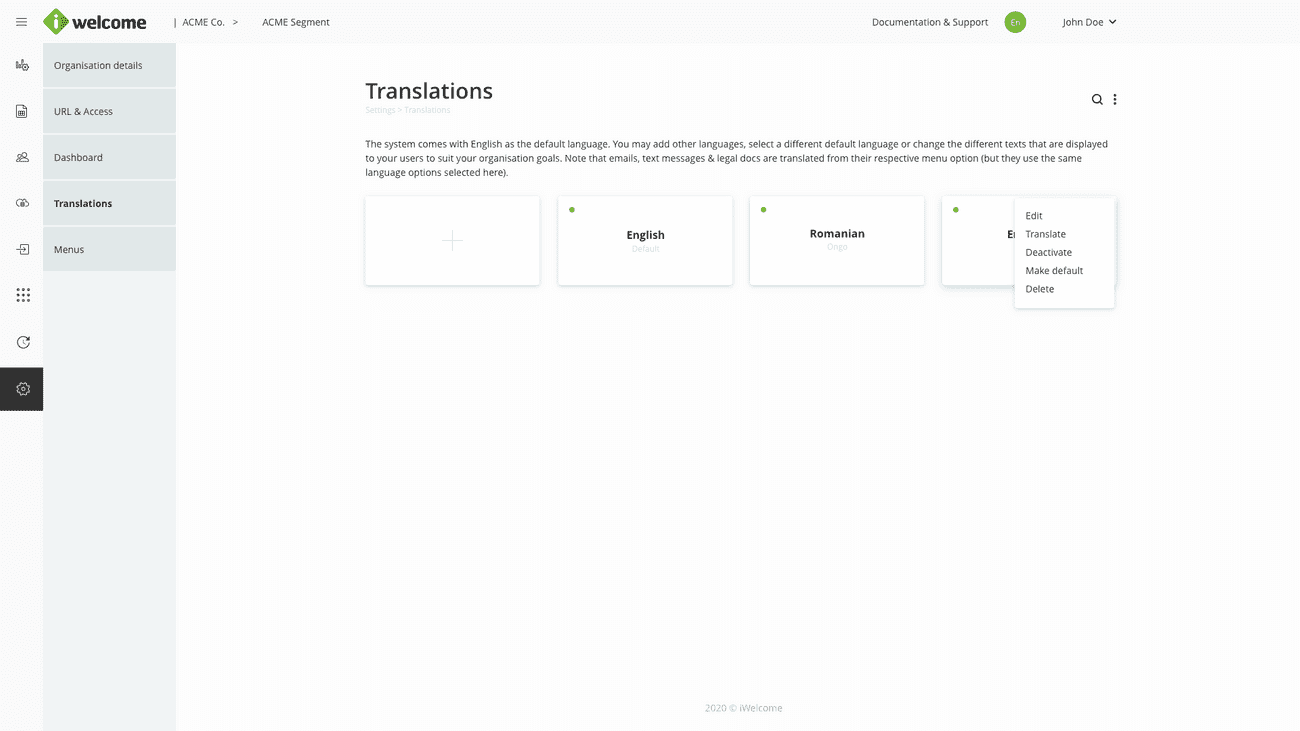
Manage localisation
Use the translation module in case you want to add multiple languages to cater the needs of both the organisation's employees & partners accessing the portal and the organisation's customers accessing the self service portal.
To learn more about translation, please visit Translations.
Assign groups & roles to users
The direct assignment of groups and roles to users is performed through the Users module. The process requires to search and find the user, navigate to his/her Profile page and perform the required changes.
Note that a user might have his/her roles or groups changed through rules, mass updates or changes triggered by his/her account condition (e.g. several failed logins).
To find out more about how to assign groups and rules to users, please visit Users -> Management.
Assign groups to users (direct assignment)
Assign roles to users (direct assignment)