This tutorial demonstrates how you can use the workflow API in a custom workflow UI, rather than using the out-of-the-box Material UI.
User onboarding involves the registration and activation flows. The registration flow typically creates a user with the bare minimum information, and the InActive state. After a user is created in the InActive state, the activation workflow starts. First it sends a verification email to the user, then the user clicks the link to verify that the email address belongs to them, and finally you can ask the user to share more information, according to the onboarding requirements.
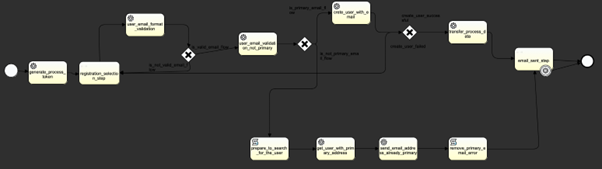
InsurCar Registration Flow
Review the registration flow BPMN for the InsurCar brand, which is available at https://insurgroup-edge.test.onewelcome.io/insurcar/registration/
- It obtains a
processToken. We can use the API from the Start Registration Flow request in the provided Postman collection.
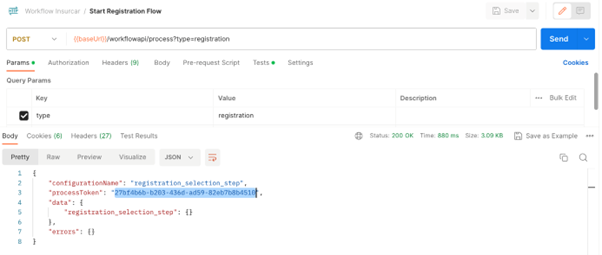
This initiates a process instance of the registration BPMN and returns a processTokenthat you can use to refer to the process instance in future requests.
It also indicates that the next UserTask in the BPMN is registration_selection_step. After the response, it is up to you to redirect the user to a UI page that requests the information that is required for registration.
After the user enters those details in the UI page, you can invoke the API to resume the workflow with the next API call.
To continue with the workflow, you need to capture the processTokenfrom the response and use that for the next request. For convivence, that information is captured in the processTokenvariable through the tests tab in the previous request. Use this variable to refer to the processTokenin your future calls.
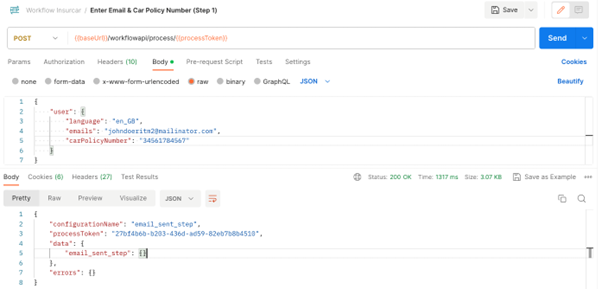
- In the InsurCar registration flow, the registration_selection_step expects the user to specify the following information:
a. Email address
b. An existing policy number
You can invoke the next API with this information, along with the processToken captured in the previous request. If the user provided valid information, all validation succeeds, and the user is created successfully, the workflow proceeds with the next steps until the next UserTask, which in this case is the email_sentstep.
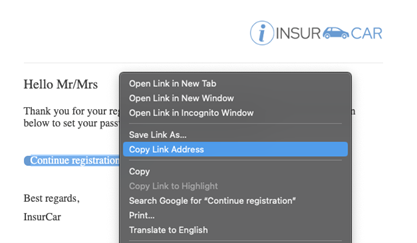
At this point, the user is created in the inactive state, which means that the activation flow gets initiated and sends a verification email to the email address that the user provided. The verification link in the email contains a processTokenand token, which is needed in the next steps for verifying the user and continuing with the rest of the flow.
To capture the ProcessTokenand token from the email, right-click the Continue registration button and copy the link address. You need to capture the processTokenand token to make your next API call, which verifies the user.
This processTokenis different from the processTokenin the registration flow, because this processToken is for an instance of the activation flow. Use this process token to continue with the activation flow execution.
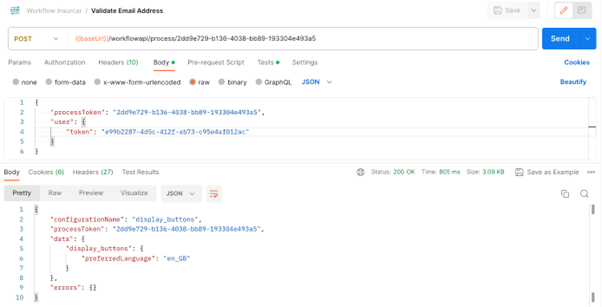
- To simulate the user click for registration, use the following call:
NOTE: For the remaining Postman requests, change the endpoint to point to the activation process token that you obtained from your email confirmation link.
{{baseUrl}}/workflowapi/process/2dd9e729-b136-4038-bb89-193304e493a5
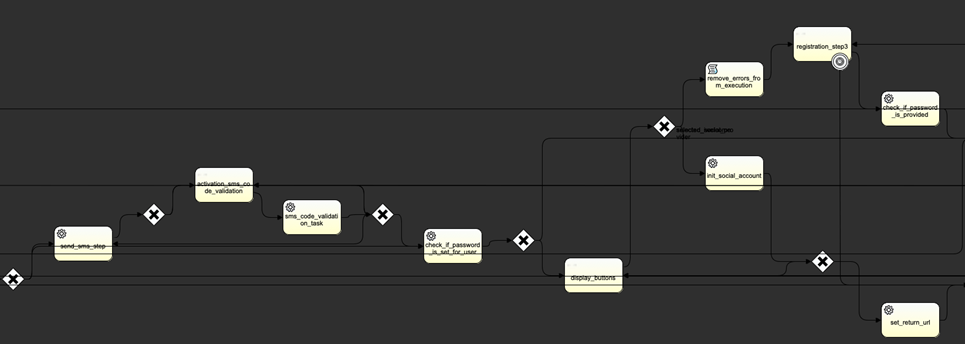
This simulates the user clicking the verify button, and gets to the display_buttons UserTask.
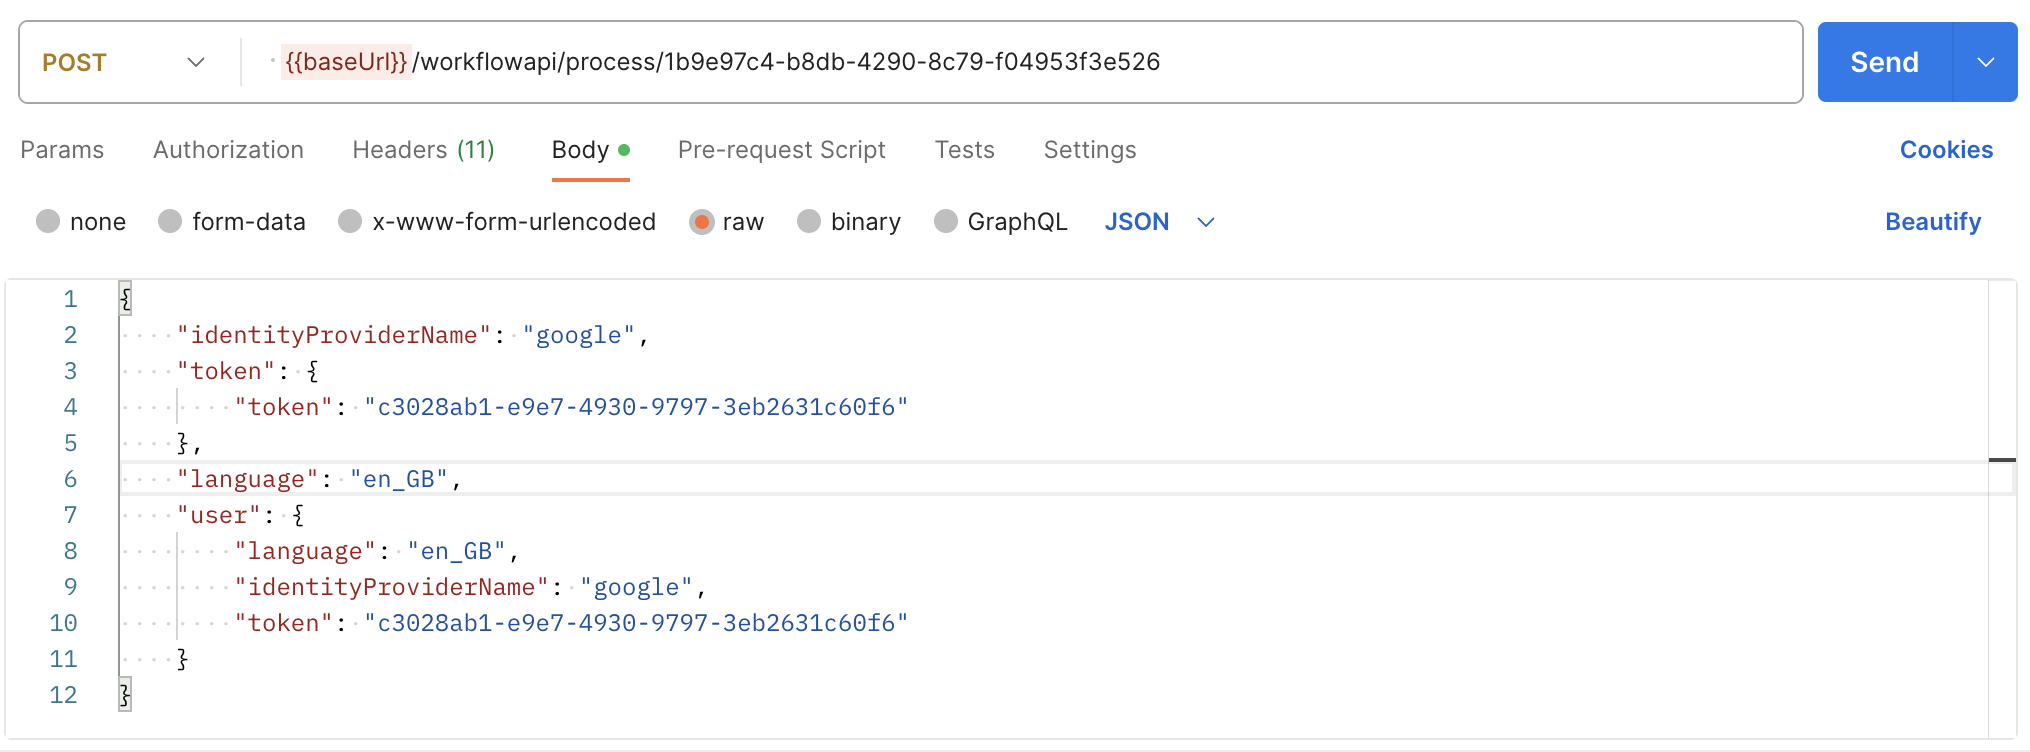
You can show the user a UI page that allows the user to choose an identity provider (IDP) that can fill in their details. In this case, keep it simple and use the continue button (which means use iWelcome as the IDP).
- To continue, use the request below:
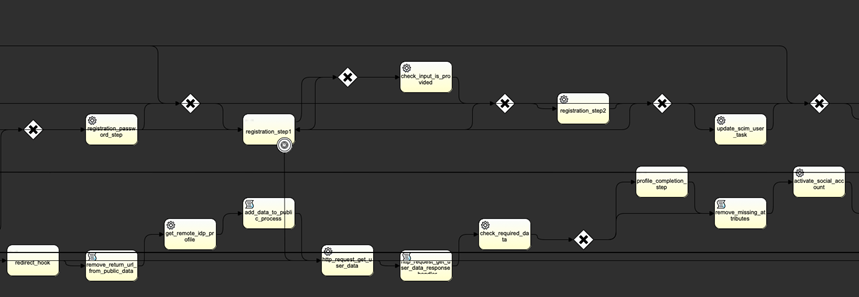
- With iwelcomeID as the IDP, the BPMN expects the user to first set a password and confirm the password with
registration_step3. To achieve that, use the call below:
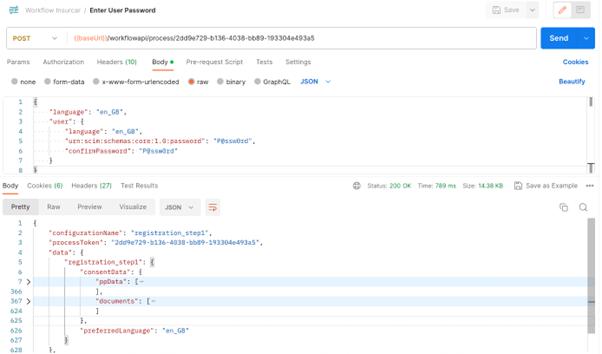
You can review the detailed response:
{ "configurationName": "registration_step1", "processToken": "2dd9e729-b136-4038-bb89-193304e493a5", "data": {}, "errors": {}}The response contains the processing purposes and privacy documents, which you can use for the next UI page for user consent. For example, the UI page might resemble the following page:
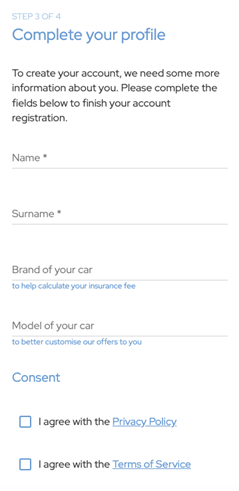
- The user can enter the details and complete the registration. To make the next call to perform that operation:
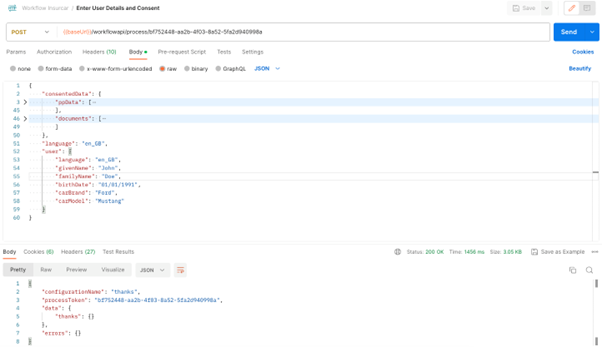
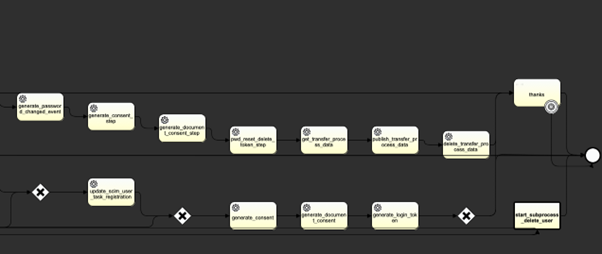
Congratulations! If you notice thanks in the response, that's because it was the last step in the workflow. The workflow completes successfully.
You used the registration and activation flow, but you can use any flow in a similar way.
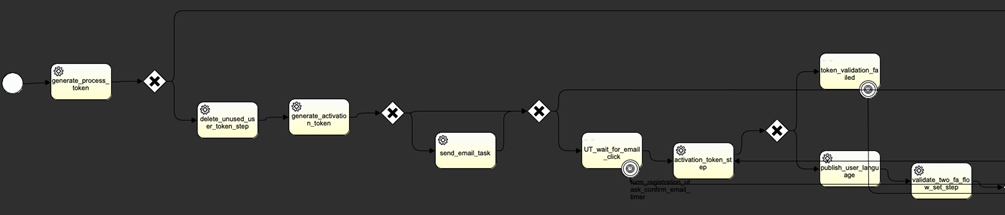
Activation Flow
For your reference, here is a visual representation of the activation workflow: